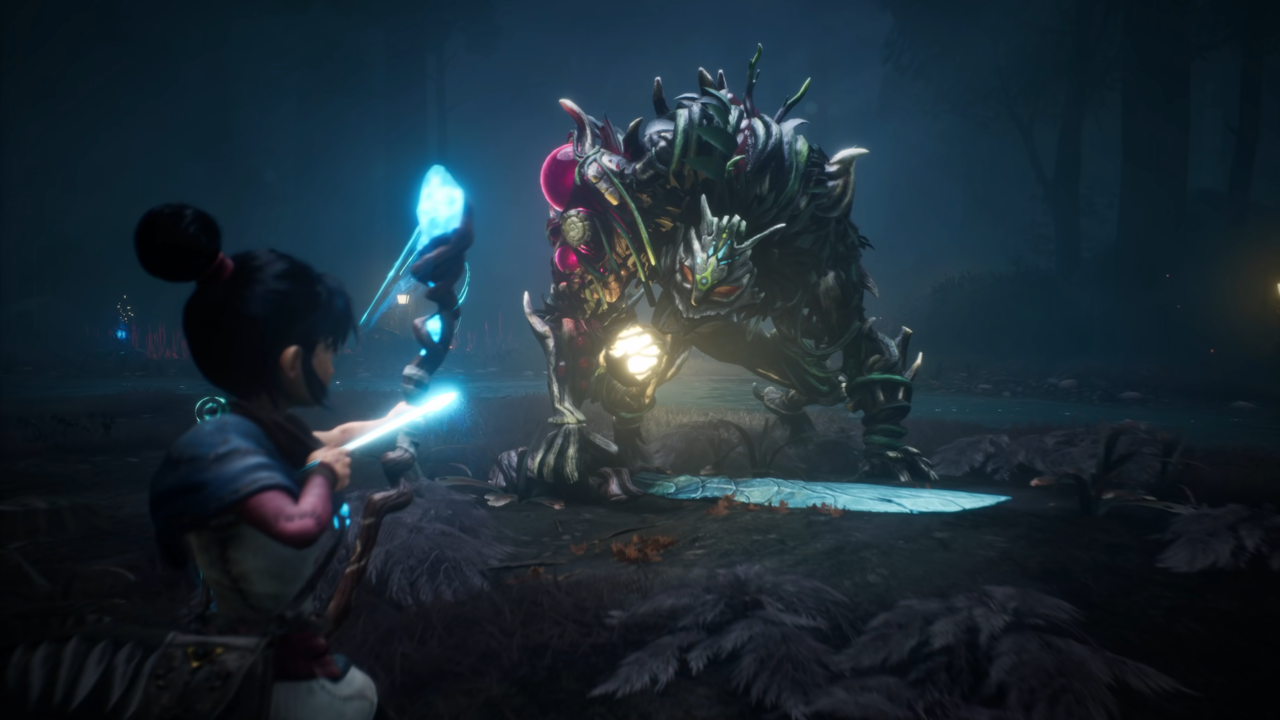
When you finally confront Taro’s spirit in Kena: Bridge of Spirits, you’ll discover that the trauma of injuring himself, losing track of his younger siblings, and becoming lost in the Forgotten Woods has transformed him into Corrupt Taro, an aggressive werewolf-like beast with a glowing sword. This is Bridge of Spirits’ first significant difficulty spike–prepare yourself for a fight that’s a lot more challenging than anything you’ve faced up to this point.
Like most boss fights in Bridge of Spirits, Corrupt Taro has two phases–the battle will go into the second phase when you reduce Taro’s health to roughly half. The boss fight takes place in a fairly circular arena, with two of the healing flowers located on the outer edges, opposite each other. That means you’ll only be able to heal twice for the entire fight. Ideally, you’ll want both flowers for Phase 2 (especially on the harder difficulty modes), so try to beat the boss’ first phase without getting hit too much so you don’t have to heal.
More Kena: Bridge Of Spirits Guides:
- How Long To Beat Kena: Bridge Of Spirits
- 13 Essential Tips & Tricks
- How To Solve The Fishing Shrine Puzzle
- Where To Find Every Spirit Mail
- Corrupt Woodsmith Boss Guide
Abilities You Should Unlock Beforehand: Sprint Attack Heavy, Perfect Charge, Parry Counter, Parry Courage, Focus, Rot Hammer, Enter the Fray
Phase 1
As the fight begins, Taro will begin to move towards you. Ideally, you have Enter the Fray unlocked, allowing you to start every fight with a Rot action available. Focus on Taro and send the Rot at the corruption on his right shoulder, stunning him. This will cause him to flail about, and change the color of his right shoulder to a shining blue. Pull out your bow and use Focus to slow down time so you can easily shoot and detonate the energy.
Following this detonation, Taro will be stunned. Sprint towards him and use a Sprint Attack (ideally heavy to deal more damage but the light variation works too), and then get three more light attacks on him. At this point, he’ll begin to recover and make a move as if he’s going to push you away–it’s all a show. If you’re quick, you can get a few more attacks on him while he’s standing up, and that should mean you’ve now hit him enough times to charge enough Courage to use another Rot action. Hit him with a Rot Hammer.
When Taro regains his composure, he’ll prepare to attack you. In Phase 1, he doesn’t have too many different attacks but they all hit pretty hard and Taro is fast enough that it’s difficult to keep track of him if you aren’t locked on. In this phase, his most common attack is a combo of three swings of his sword–the first two will come in quick succession and then he’ll pause to charge up for a harder swing. This attack can be pretty easily avoided by dodging to your left (Taro’s right) beneath the first swing and behind him. Just be prepared to dodge again, as he can sometimes pull a full 180 turn for his third swing. Taro may also do a single swing lunge attack or a leaping attack that ends with him landing and swinging at you three (and occasionally, four) times–you can dodge under both moves.
If you’re confident in parrying, the ground-based attacks present an ideal opportunity to parry Taro–that will open him up for you to respond with Parry Counter and if you have Parry Courage unlocked, you’ll gain a Rot action. Assuming that’s what you do, hit him with Rot Hammer again.
If that’s not what you do, dodging past Taro’s attacks will open him up, allowing you to hit back. You can usually get in two light attacks before he leaps away, preparing to attack you again. You should also have enough time to get in one heavy attack–which is great if you have Perfect Charge unlocked and can deal extra damage for a perfectly timed heavy attack.
There’s one other move you need to be wary of in this phase. Taro rarely uses it (especially on the lower difficulty modes) but it’s worth calling out. Sometimes, a red aura will appear around Taro–this is his Phase 1 unblockable attack. It’s an area-of-effect burst of energy that cannot be parried or defended against with Shield. You just have to recognize it and dodge out of the way. Thankfully, you have plenty of time to do so.
At this point, it’s time to push Taro into his second phase. Take notice of the lantern around his neck. Pull out your bow and use Focus to line up a shot and shoot the lantern–it will cause the fire inside to burst out, temporarily blinding and stunning Taro. Run in and get your sprinting attack on him and keep hitting him until you have a Rot action ready. Use Rot Hammer, and that should be enough damage to push Taro into his second phase. If it’s not, repeat this process.
Phase 2
You’ll know Phase 2 has begun when an orangish glow begins appearing around Taro. Flee, dodge, whatever you gotta do to get out of there–he’s about to release a small but hard-hitting fiery area-of-effect attack.
After expelling the energy, Taro will leap back, charge up and dash right at you with a speed he has not displayed before. Go for the dodge and then get ready because he’s going to try and swing at you three more times and finally slam his sword down on you for a fourth strike. Taro’s sword will then explode (damaging you if you’re still in the vicinity). Without a weapon, Taro will begin crawling along on all fours–in this phase he no longer has the range of his sword but he makes up for it in faster attacks.
In this phase, Taro has access to all the attacks he had before, albeit they’re faster. He’ll also start scampering around the outskirts of the arena, waiting for his chance to strike. He’ll either turn and jump at you with both fists raised, turn and jump at you with his right hand cocked back, or turn and run at you. If both fists are raised, he’s getting ready to descend on you with a ground pound that reverberates out, dealing area-of-effect damage. If his right hand is cocked back, he’ll land on you and claw at your face, also swinging his tail to hit you if you try and dodge behind him. These attacks hit hard but they’re fairly easy to dodge if you roll away from Taro as he attacks.
The last attack is a bit harder to deal with. If Taro starts running at you, he’s preparing to lunge. If he lunges at you and you do not dodge to either side fast enough, he’ll grab you and squeeze you until Kena’s body makes a terrifying snapping noise, dealing a lot of damage. This attack is unblockable–you cannot use Shield or a parry to counter it, nor can you hit Taro with an arrow to stun him out of the attack. Once the attack is in motion, you can only dodge it or (assuming it’s lit) shoot the lantern around Taro’s neck to blind him and trip him up.
Regardless of what Taro does, your goal remains the same. Wait until his lantern lights up, shoot it with an arrow to stun him, and then keep swinging on him until you have enough Courage to use Rot Hammer. Rinse and repeat. Eventually, he’ll fall.
Source: Gamespot


